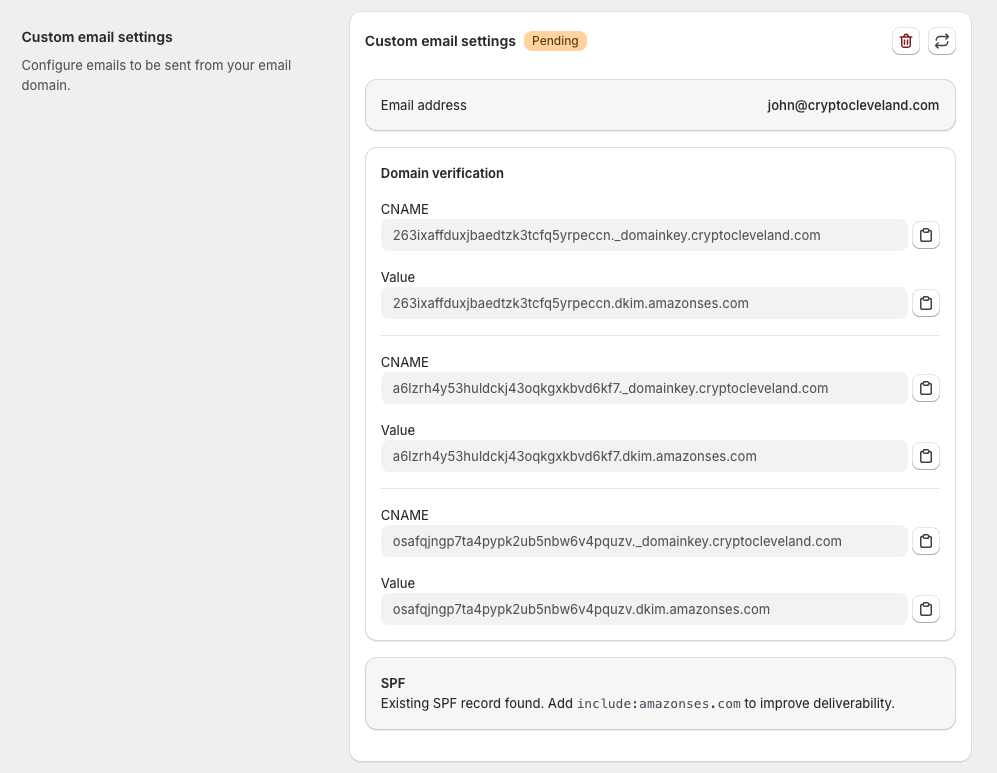
ABC Digital Downloads lets you send download emails directly from your own email domain instead of our default address. This improves brand recognition and email deliverability.
Step 1: Add Your Custom Email
- In your Shopify admin, open ABC Digital Downloads.
- Navigate to Settings → Custom Email Settings.
- Enter the email address you want to use (e.g.,
[email protected]). - Click Save.

Step 2: Verify Your Domain
After saving, we’ll generate DNS records you must add to your domain provider to verify ownership and authorize email sending.
You’ll see:
- 3 CNAME Records – Used for DKIM signing.
- TXT Record (SPF) – Authorizes our servers to send emails on your behalf.

Step 3: Add DNS Records to Your Domain
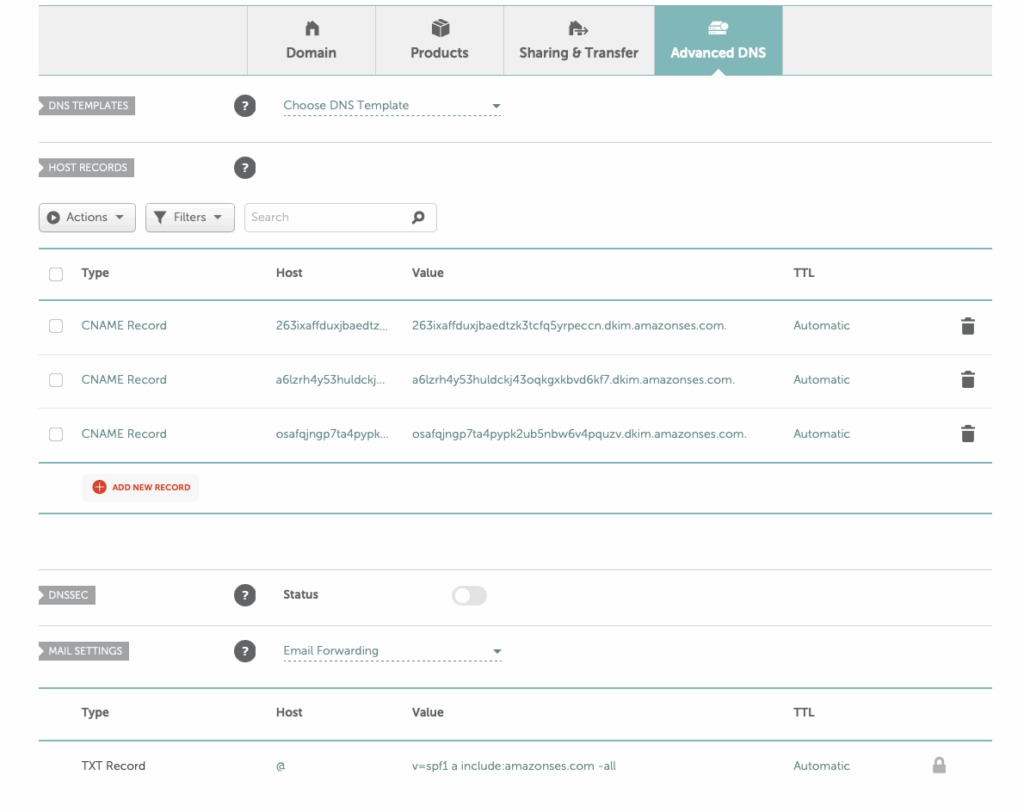
- Log in to your DNS host (GoDaddy, Cloudflare, Namecheap, etc.).
- Open the DNS Management or DNS Settings page.
- Add each CNAME record as provided.
- If you have an existing SPF record:
- Edit it to include: makefileCopyEdit
include:amazonses.com - If none exists, create a new TXT record:
iniCopyEditv=spf1 include:amazonses.com ~all
- Edit it to include: makefileCopyEdit
Note – Some DNS providers will append the domain name to the record make it there twice, e.g. _acme-challenge.partners.aveno.io.aveno.io

Step 4: Wait for Verification
- DNS propagation can take up to 24-48 hours.
- Once verified, the status in ABC will automatically change from Pending → Verified.

Step 5: Start Sending From Your Domain
After verification:
- All download-related emails (file access, updates, limits) will be sent from your custom email address.
- Customers will see your domain in their inbox, boosting trust and reducing spam filtering.
✅ Troubleshooting
- Verification stuck: Use MXToolbox to confirm DNS records are correct.
- Duplicate SPF: Ensure you only have one SPF record with
include:amazonses.com. - Emails still sending from ABC: Double-check that verification is complete and no errors appear in settings.

